 |
| By Upstate |
Yesterday I went to a fabric dyeing class in Brooklyn, taught by Katrin Reifeiss. It is about a specific Japanese technique called the Shibori. It involves binding techniques, stitching, folding and pole-wrapping. Here is a quick introduction of Shibori based on what I learned. For a thorough introduction, you can also view videos by Narablog on youtube.
Katrin Reifeiss, who also teaches at Textile Arts Center in Brooklyn if you are interested for the full course. But ours was just 3 hours and it flew by like an hour! Here is our table. There was a bucket of squeeze bottles of dyes we could have used for direct dye method but it would have taken at least 12 hours for the fabric to cure in dyes to complete so we opted for the tub dye method, using buckets of dye water and submerging our fabric in it for a few minutes to 45 minutes to achieve the dye.
There are 4 types of methods as I introduced at the beginning of the post. Below is the Pole-Wrapping Shibori technique called the Arashi "Storm" Shibori. It involves some folding of the fabric (or not), then wrapping it around a pole (you can get the PVC pipes from Home Depot) and then stringing the thread over in horizontal lines tightly, then pushing up the fabric to bunch it up before dyeing. Katrin was demonstrating on a scarf she has made before the class. The red scarf is then dyed in navy so you can see the black lines which is the bunched up fabric exposed to the dye, and the lighter red lines which is covered by the thread (i.e., the resist) which is not dyed.
The other method is called the Binding techniques. Below are some examples:
 |
| Ring Shibori - a string is tied to a little bit of fabric bunched up. The white line seen here is created by the resist of the string. |
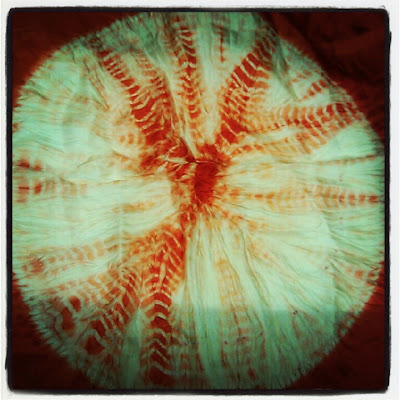
My attempt at the Spiderweb Shibori was ok. The strings were too thin and the color is a bit too light so I cannot really see the horizontal lines. But the ombre effect of yellow to green is very nice in reality.
My classmate of the day, Christina, is working on her skirt here to try and create an ombre effect. She did a combination of Spiderweb and Arashi on her scarf below and it came out really beautiful.
Another example of the binding techniques is the pleated stripes. Here Katrin made an example for us using this technique, which starts off with pleating your fabric and securing it with rubber band or a string, then you wind the string down the folded fabric to create the horizontal lines you see here. I tried but mine was horrible. Note to myself, must fold my pleats a lot tidier next time and tied the string tight around the fabric!
Then there is the Stitching Shibori Method and this is called the Ori-Nui. You start with drawing a pattern on the fabric, then fold it up a little into a ridge, and stitch running stitches in regular intervals right under the fold line, pull tight to bunch up, then dye. After you dye it, the pattern will emerge as white dots. It is absolutely beautiful.
The last method is called the Folding techniques. Below is my work (yay!) from yesterday which is a not very regular Tortoiseshell Kikko Pattern. The folding techniques involve pleating the cloth, then folding it in triangles or squares, and clamping it down sometimes on its own, or sometimes with a resist material. To achieve the tortoiseshell, I used a pair of chopsticks clamped on both sides of my folded triangular shaped fabric and submerged it into the dye to get all the fabric colored, except for the part where the chopsticks were clamped in tightly. The yellow is actually part of the black dye which somehow got separated from the black and the effect is random but lovely.
Here is my friend Atsuko, and our teacher Katrin. Atusko's dress was dyed using the folding technique, and then using a plastic resist in the shape of a circle but somehow it came out square...?
Fabric dye is fun and I love the surprise you get everytime you unwrap a piece. Of course, the masters can always control the dye. But for me, it is like magic!


.jpg)
